

You have a website, but do you know how many people visit it, how they found you or whether they turn into enquiries and sales? Without Google Analytics and Google Search Console set up properly, you are guessing.
Both tools are free, and together they show what happens before someone clicks through from Google and what they do once they arrive. The problem is that many small business websites have them half set up: tracking code missing from some pages, no conversions recorded, or a Search Console account nobody has looked at in years.
In this guide I'll walk you through how to set up Google Analytics 4 and Google Search Console step by step, connect them, and check that everything is working.
Quick Answer: How Do You Set Up Google Analytics and Search Console?
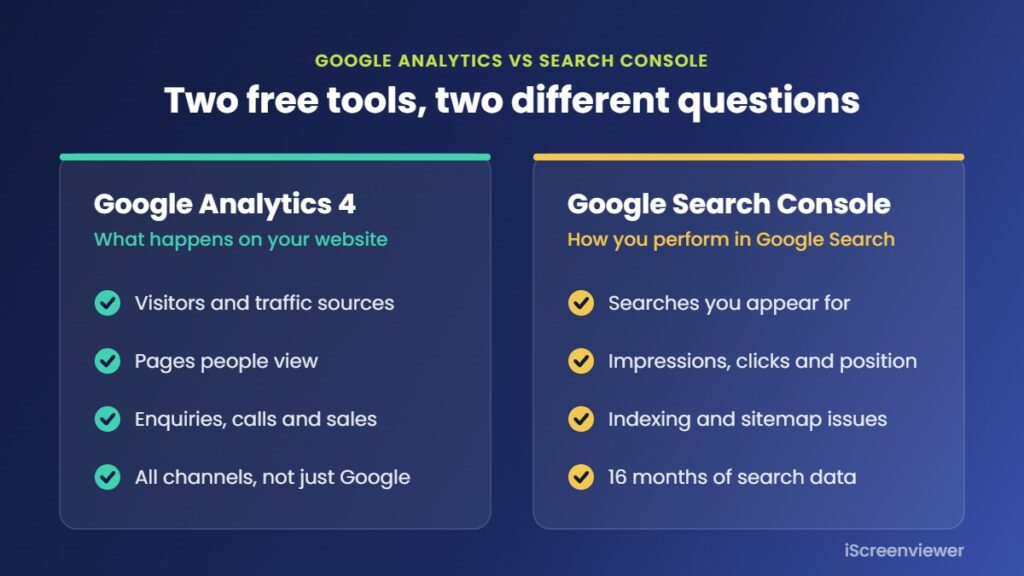
Create a Google Analytics 4 property and web data stream, add the tag to your website using your platform's integration, mark your enquiry and purchase actions as key events, and set data retention to 14 months. Then verify your domain in Google Search Console with a DNS record, submit your XML sitemap, and link Search Console to GA4 under Admin, Product links.
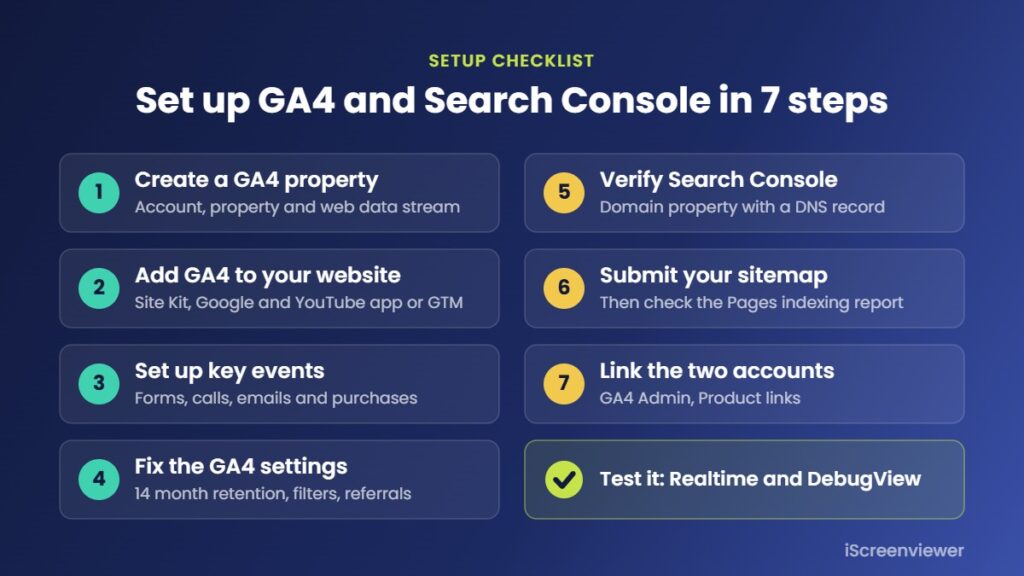
Google Analytics vs Google Search Console: What Is the Difference?
People often mix them up, but they answer different questions:
| Google Analytics 4 | Google Search Console | |
|---|---|---|
| What it shows | What visitors do on your website | How your website performs in Google Search |
| Key data | Users, traffic sources, pages, enquiries and sales | Search queries, impressions, clicks and average position |
| Covers | Every traffic source: Google, social, email, ads, direct | Google Search only |
| Technical checks | Not really | Indexing, sitemaps, page experience and security issues |
| Data history | Up to 14 months in explorations (standard property) | 16 months of search performance data |
You need both. Search Console tells you which searches bring people to your site, and Google Analytics tells you whether those people become customers.
Step 1: Create Your Google Analytics 4 Property
- Go to analytics.google.com and sign in with your business Google account, not a personal one you might lose access to.
- Create an account for your business, then create a property. Set the reporting time zone (for example Australia/Sydney) and your currency.
- Enter your business details and choose your objectives.
- Create a Web data stream with your website address. Leave enhanced measurement switched on so GA4 records page views, scrolls, outbound clicks, site search and file downloads automatically.
- Copy your Measurement ID, which starts with G-. You need it for the next step.
Step 2: Add Google Analytics to Your Website
Only use one installation method. Adding GA4 twice, for example through a plugin and a theme setting, double counts your visits.
WordPress and WooCommerce
The simplest option is the free Site Kit by Google plugin, which connects Analytics and Search Console from inside WordPress. If you already use Google Tag Manager, add a Google tag with your Measurement ID in Tag Manager instead. For WooCommerce purchase tracking, use the Google for WooCommerce extension or a Tag Manager setup that sends the purchase event.
Shopify
Install the Google and YouTube app from the Shopify App Store, connect your Google account and choose your GA4 property. It adds page views and eCommerce events, including add to cart, checkout and purchase, without editing your theme.
Other platforms
On Umbraco, Squarespace, Wix and custom builds, either paste the Google tag into the site template so it loads on every page, or install Google Tag Manager and manage GA4 from there. Tag Manager makes it easier to add more tracking later without changing code.
Step 3: Set Up Key Events (Conversions)
Page views alone do not tell you much. Key events, which Google previously called conversions, are the actions that matter to your business. For most small business websites these are:
- Contact or quote form submissions (ideally tracked from the thank you page or a form success event)
- Clicks on your phone number and email address
- Online purchases for Shopify and WooCommerce stores
- Bookings, downloads of a price list or brochure, or newsletter sign-ups
Once an event is recording in GA4, go to Admin, Data display, Events and mark it as a key event. Keep the list short. If everything is a key event, nothing stands out.
Step 4: Change the GA4 Settings Most Websites Miss
- Data retention: GA4 keeps detailed data for only 2 months by default. Change it to 14 months under Admin, Data collection and modification, Data retention.
- Internal traffic: define your office IP address in the data stream's tag settings, then activate the internal traffic filter so your own visits do not inflate the numbers.
- Unwanted referrals: add payment gateways such as PayPal, Stripe or Afterpay to the list of unwanted referrals, otherwise sales get credited to the payment site instead of the real source.
- User access: make sure the business owner has Administrator access, not just the developer or agency who set it up.
Step 5: Verify Your Website in Google Search Console
Go to search.google.com/search-console and add a property. You will see two options:
- Domain property (recommended): covers every version of your site, including www, non-www, http, https and subdomains. Google gives you a TXT record to add in your domain's DNS settings, usually at your domain registrar or host.
- URL prefix property: covers one exact address only. It can be verified with an HTML file, a meta tag, your Google Analytics tag or Google Tag Manager, which is handy if you cannot access DNS.
DNS changes can take a little while to update. If verification fails at first, wait and try again.
Step 6: Submit Your Sitemap and Check Indexing
Your XML sitemap lists the pages you want Google to find. In Search Console, open Sitemaps and submit the address of yours:
- Shopify: /sitemap.xml
- WordPress: usually /sitemap_index.xml or /sitemap.xml from your SEO plugin, or /wp-sitemap.xml if you do not use one
Then check the Pages report under Indexing. It shows which pages are indexed and why others are not, such as noindex tags, redirects, duplicates or pages Google has crawled but not indexed yet. Use the URL Inspection tool to test an important page and request indexing after you update it.
Step 7: Link Search Console to Google Analytics
In Google Analytics, go to Admin, Product links, Search Console links and link your Search Console property to your web data stream. You need to be an Editor in GA4 and a verified owner in Search Console.
Once linked, you can publish the Search Console reports in GA4 and see the Google search queries and landing pages that bring visitors, next to what those visitors did on your site.
How to Check Your Tracking Is Working
- Open your website in another browser tab and check the Realtime report in GA4. Your visit should appear within a few seconds.
- Use DebugView in GA4, with Google Tag Assistant, to confirm key events fire when you submit a form or click your phone number.
- Place a test order on your store (then refund it) to confirm the purchase and revenue are recorded once.
- Look at your page source or Tag Assistant to make sure the Google tag loads only once per page.
- Check Search Console again after a few days to confirm data is coming in and your sitemap was read successfully.
Common Google Analytics and Search Console Mistakes
- Old Universal Analytics code (starting with UA-) still on the site, which no longer collects data
- GA4 installed twice, doubling page views and halving your bounce rate overnight
- No key events, so you can see traffic but not results
- Data retention left at 2 months
- Accounts created under a former staff member's or agency's personal email, so the business loses access
- A Search Console URL prefix property for the wrong version of the domain, such as http instead of https
- Search Console verified but never linked to GA4, and nobody checking it
Get Google Analytics and Search Console Set Up for You
If you would rather have it done for you, my Google Analytics and Search Console Setup package is a fixed price of A$349.
It includes GA4 set up and installed for your platform, key events for enquiries, calls and sales, the right data settings, Search Console verified by DNS with your sitemap submitted, both accounts linked and owned by you, plus a summary and handover video.
View the package, or if you already have tracking and want it checked, start with the SEO and Analytics Health Check.
Related Articles
- SEO and Analytics Health Check: 10 Signs Your Website Needs an Audit
- How to Get Your Business Found in AI Search
- How to Write Product Listings That Rank on Google (Shopify and WooCommerce)
- Common WordPress Problems and How to Fix Them
Frequently Asked Questions About Google Analytics and Search Console
What is the difference between Google Analytics and Google Search Console?
Google Analytics shows what people do once they reach your website, such as the pages they view and whether they enquire or buy. Google Search Console shows how your website performs in Google Search before the click: the searches you appear for, your clicks and average position, and whether Google can index your pages.
Is Google Analytics 4 free?
Yes. Google Analytics 4 and Google Search Console are both free for small business websites. You only need a Google account to set them up.
Should I use a domain property or a URL prefix property in Search Console?
Use a domain property where you can. It covers every version of your website, including www, non-www, http and https, and any subdomains. It needs a DNS record added at your domain provider. A URL prefix property only covers one exact version of your address.
How long does it take for data to appear?
Realtime visits show in Google Analytics within seconds of tracking going live. Standard GA4 reports usually fill within 24 to 48 hours. Search Console data for a newly verified website can take a few days to appear.
Why is my GA4 data different from Search Console?
They measure different things. Search Console counts clicks from Google Search, while Google Analytics counts sessions from every source and can miss visitors who block tracking or leave before the page loads. Small differences are normal.
Can I add Google Analytics to Shopify without code?
Yes. Install the Google and YouTube app from the Shopify App Store, connect your Google account and select or create your GA4 property. The app adds page view and eCommerce tracking, including purchases, without editing theme code.